Customize MicroStrategy Web with MicroStrategy Customization Editor
MicroStrategy
SDK provides a Web Customization Editor that can be used to create a
customization plug-in. The following steps guide you in creating the plug-in
and deploying it.
Creating a New Plug-in
This topic describes how to create a new plug-in using the Web
Customization Editor. This plug-in will contain all the files related to your
customization.
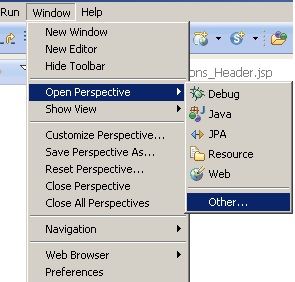
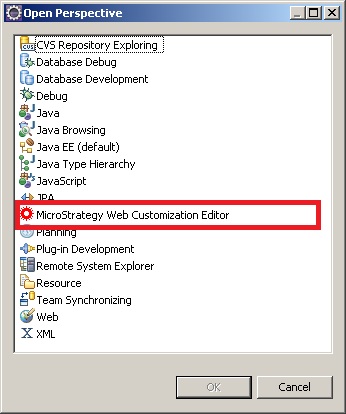
- Launch the Web Customization Editor.
- Click
 on the
toolbar for the Application Settings or the CSS Settings views
to launch the Select Plug-In dialog.
3. Click New >>.
4. Enter a name
for the plug-in in the Plug-in Name text field.
5. Click OK.
The new plug-in folder gets created with the necessary subfolders (such as asp/jsp, style, and WEB-INF) inside the plug-ins folder
in the MicroStrategy Web installation. The name of the plug-in displayed in the
status bar at the bottom.
Replacing the
MicroStrategy Web Button
This scenario deals with replacing the MicroStrategy Web Button with an
image or logo of your choice. The task involves modifying a CSS file to update
the reference to use a new image such that this customization is globally
applied on all MicroStrategy Web pages. The MicroStrategy Web Button is used
for navigating to the Welcome page. It comprises two images such that the
second image is displayed when the mouse is hovered on it.
2. Click on CSS inside the CSS Settings view to expand the hierarchical tree. The
expanded list comprises the different CSS files used in MicroStrategy Web.
3. Navigate to MicroStrategy Web
Styles->style->mstr.
4. Click on mstr.css to expand the rules defined within
this CSS file.
5. Click on .mstrLogo to expand the properties defined for
the rule.6. Double-click on background to launch the Update CSS Property dialog.
7. Click on Utils >> to view the Utilities panel.
8. Click the Image button on the Utilities panel to navigate to the image.
9. Select the image and click OK. The location of the image gets updated in the Value text field.
10. Make sure the Apply to All Pages radio button is selected.
8. Click the Image button on the Utilities panel to navigate to the image.
9. Select the image and click OK. The location of the image gets updated in the Value text field.
10. Make sure the Apply to All Pages radio button is selected.
11. Click OK. The updated background property gets added under the .mstrLogo rule inside a newly created 12. CSS file
"golbal.css" under CSS->Customized Web
Styles->style.
13. Click on A.mstrLink:hover .mstrLogo (under MicroStrategy Web
Styles->style->mstr->mstr.css) to expand the properties defined for this
rule.
14. Double-click
on background-image to launch the Update CSS Property dialog.15. Click on Utils >> to view the Utilities panel.
16. Click the Image button on the Utilities panel to
navigate to the image for the mouse-hover effect.
17. Select the
image and click OK. The location of the image gets updated in the Value text field.
18. Make sure
the Apply
to All Pages radio button is selected.
19. Click OK. The updated background-image property gets added under the A.mstrLink:hover .mstrLogo rule inside the CSS file "global.css" under CSS->Customized Web
Styles->style.
20. Launch
MicroStrategy Web to view the customization.


